Bored of BASH? Try ZSH!
For years and years I used the standard Bash (Bourne Again shell) terminal and I still do as it is mostly the default shell but these days I tend to veer towards Zsh (Zee shell! or Zed shell if you’re me) for its sheer ease of customisation in the shape of various installable plugins. I was introduced to this by an awesome colleague of mine way back in 2021 and I haven’t looked back since. This is how I customise and use Zsh but there are hundreds of other ways to do the same thing. I hope this piques some interest for a few intermediate terminal users looking to nerdify their Linux environment.
Change your default shell to Zsh (or any other shell for that matter)
This depends on your distribution of choice. You might want to leave this step til the end in case you decide you hate Zsh and never want to use it again. If you want to try out other shells available to you by your distribution (Ubuntu, Fedora, Debian, etc) then all you need to do is type:
cat /etc/shells
into your terminal. If you type the name of the particular shell that you want to try into your terminal i.e.
zsh
Then you are now using that shell. To exit just type:
exit
“Are you really a Devops engineer???” I can hear you shouting. Honest I is. So here’s some cooler stuff.
If you want the new shell (zsh in this case) to persist then you need to type:
chsh -s /bin/zsh
I just realised that chsh might need to be installed first so double check. If for whatever reason zsh is not installed then try the repository for your distro and have another crack at adding it. There are many ways to add the shell to your environment and this is just one. If you want to confirm which shell you are using as default then type:
echo $SHELL
You may have to log out and back in again to get the terminal to accept the new changes.
Install Oh My Zsh
OK, so now you’re using Zsh and you think so what?
Well this is the cool bit. There’s this plugin called Oh My Zsh that I absolutely love. It makes configuration so much simpler and makes your terminal just look really awesome.
There are clear instructions on how to install Oh-My-Zsh on their website or on their GitHub page but you can start by inputting:
sh -c "$(curl -fsSL https://raw.github.com/ohmyzsh/ohmyzsh/master/tools/install.sh)"
in order to install Oh-My-Zsh if you have Curl installed. You can do the same with Wget and instructions are available on the site.
Installing the Powerlevel 10K theme
If you have read the Oh-My-Zsh website in detail by now, you will see that there are lots of awesome themes you can use and you might want to just stop there. I prefer to use the Powerlevel10K theme. In order to use it you first need to install the MesloLGS NF Regular font. In Linux this is very easy. Download that font and open it and press ‘Install’. See? Told you. Again, instructions are on the Powerlevel10K link above. You might also have to change your font to Meslo NF Regular in your terminal emulator of choice. I choose: Terminator.
To install the theme with Oh-My-Zsh installed all you need to do is type:
git clone --depth=1 https://github.com/romkatv/powerlevel10k.git ${ZSH_CUSTOM:-$HOME/.oh-my-zsh/custom}/themes/powerlevel10k
assuming you have git installed. If not consult your preferred repository in the usual manner but I assume you have the capacity to install Git and Curl by this point.
Now to get the most out of Zsh then you need to edit your shiny .zshrc file located in your home or “~” directory. Type:
ZSH_THEME="powerlevel10k/powerlevel10k"
at the head of your file using Vim or Nano and save and quit.
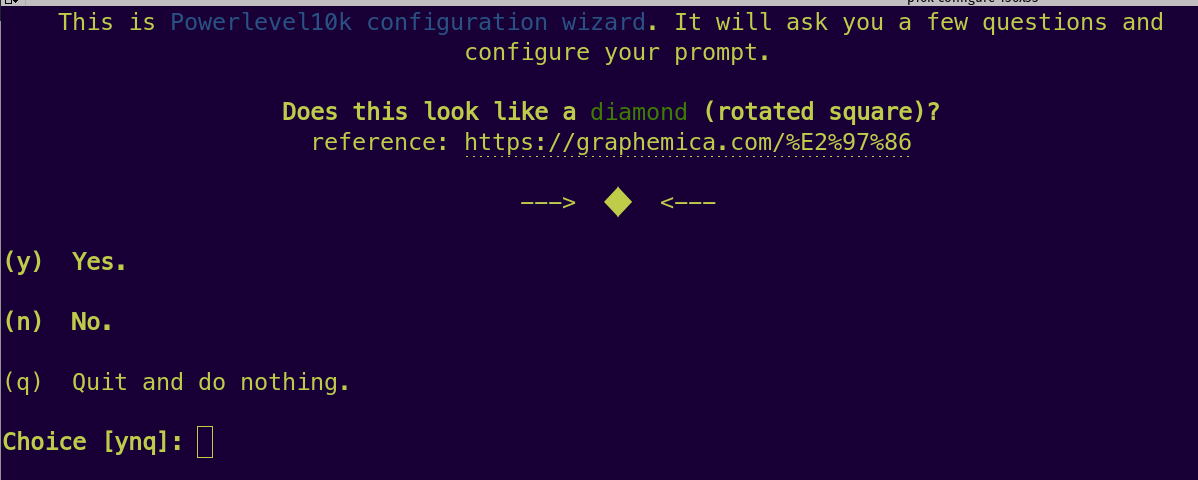
Now in order to make your terminal look something like mine:

Now you have your theme and your shell decided upon. It is time to make it do even cooler stuff. Yes that’s right. Now you can:
Install Plugins!
This is what separates the hipsters from the imposters(?). I couldn’t think of a better analogy, sorry.
Anyway! There are a few other blogs and guides that show you these plugins and that is because they are super helpful, will increase your general workflow and make you look like a terminal wizard (Gandalf style beard = optional but preferred). We are talking syntax highlighting and auto-suggestions! Yeah man!
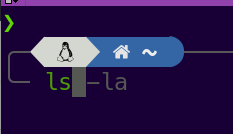
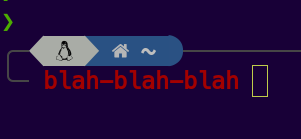
Syntax highlighting will show you when a command is not installed by making it red and by making a command that does work, green. Auto-suggestions will show you commands you have run in the past and you can save time by pressing the right arrow key to complete the text. For instance this grey section is the suggestion:

And this shows the command that will fail:

And this is when it works:

Simply clone these two repos to the required home location for Oh-My-Zsh:
git clone https://github.com/zsh-users/zsh-syntax-highlighting.git git clone https://github.com/zsh-users/zsh-syntax-highlighting.git ${ZSH_CUSTOM:-~/.oh-my-zsh/custom}/plugins/zsh-syntax-highlighting

git clone https://github.com/zsh-users/zsh-autosuggestions ${ZSH_CUSTOM:-~/.oh-my-zsh/custom}/plugins/zsh-autosuggestions
Now you have cloned the repos for the plugins you need to enable them in your .zshrc file. Open the file and search for “plugins”. You should find a heading and a plugin in brackets. Edit this to look like:
plugins=(
	zsh-syntax-highlighting
	zsh-autosuggestions
)
I have also added “git”, “kubectl”, “colored-man-pages” and “terraform” to this list among others. I think git is usually already included by default but you can find more plugins at the GitHub repo for Oh My Zsh plugins. Some of them are simple aliases for commands which I find really useful but others have more elaborate results.
Conclusion
And away you go! Feel free to experiment with themes and plugins for Zsh to your heart’s content. I hope this helped. Feel free to comment, email or even buy me a coffee! Thanks for reading!
☕ Enjoyed this post? Buy me a coffee!
